|
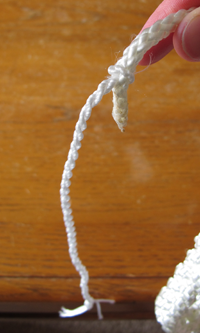
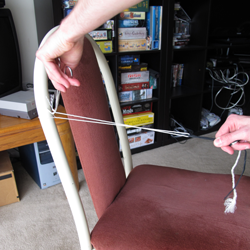
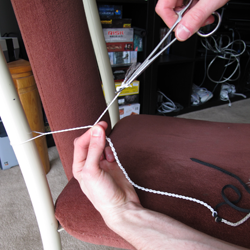
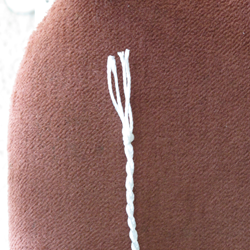
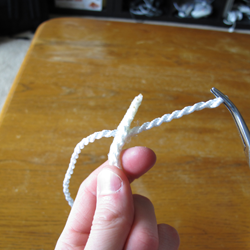
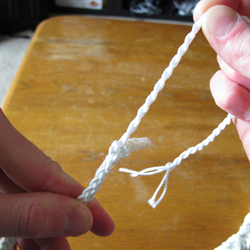
First, we must prepare the tip of our whip for the installation of the popper. Grab hold of the core
filling in the tip of Rope A, and gently slide down the nylon braiding as shown. You want to expose the
halfway point between the tip of the core filling and the point where Rope B is braided with Rope A.
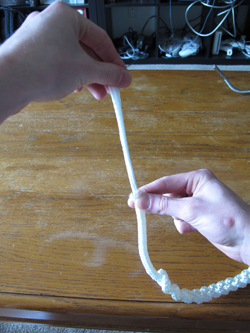
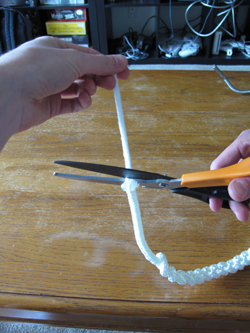
Use scissors to cut the core filling at this halfway point, and then gently extend the rope braiding
back to full length.
|
 |
|
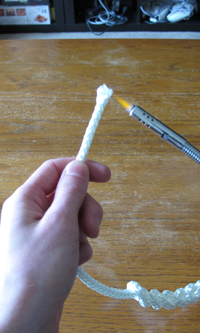
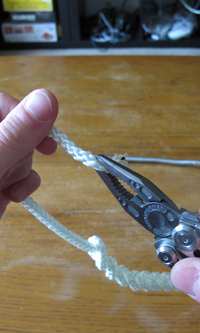
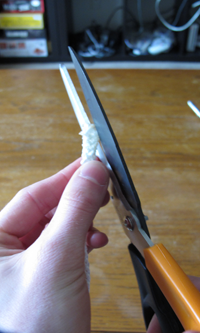
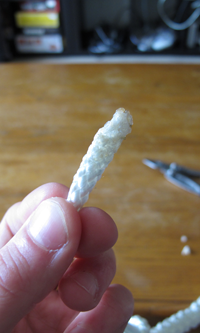
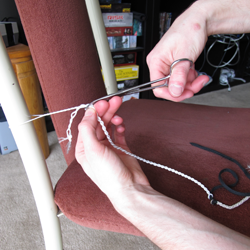
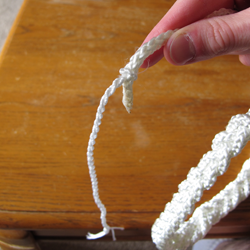
Use your butane lighter to melt the tip of your whip - torch the first inch of Rope A to ensure that it
doesn't become frayed over time. Before the tip cools off, use your pliers to pinch the tip of your whip
shut. If the tip of your whip takes on a fan-like shape when it cools, feel free to trim the side edges
to keep the tip of your whip at a consistent width.
|
 |
|
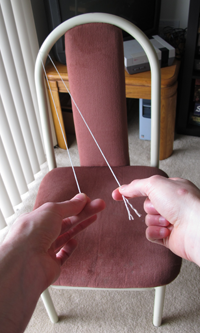
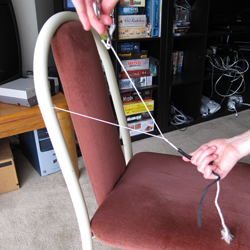
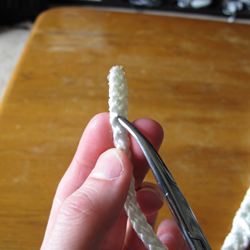
Take your 5-ft. length of Twisted Mason Line and pass it through a secured loop somewhere in your work
area. This can be anything from a door knob to a handle on your dresser or even a table leg. Grab both
ends of your Twisted Mason Line and secure them with your forceps (or use a mini binder clip).
|
 |
|
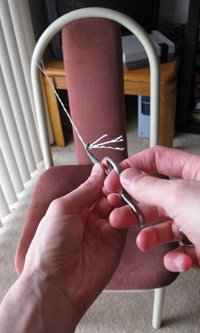
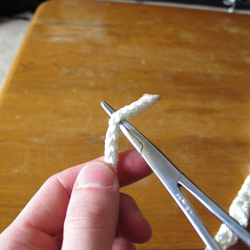
Begin twisting your forceps in the same direction that the Twisted Mason Line is twisted in. The Mason
Line should start getting tighter as you twist your forceps. Be sure to pull back on the Mason Line as
you're twist your forceps; you want to keep the Mason Line taut so that it doesn't start to develop kinks
in itself while you're working.
|

 |
|
Keep twisting until your Mason Line is very tight. When you see kinks developing in your Mason Line by
moving your forceps towards the opposite end of the Mason Line, you know you're ready for the next step.
|
 |
|
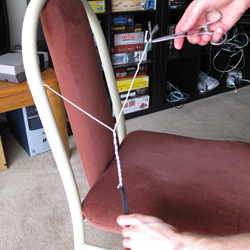
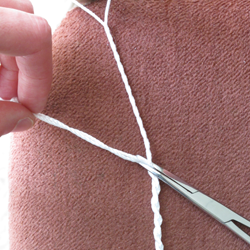
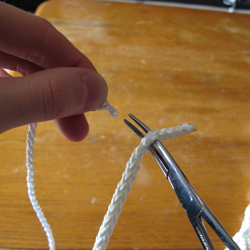
Grab a stray length of string that you may have lying around, and place it on the halfway point along the
length of your tightened Mason Line. Grab hold of this string with your free hand, and gently pull it
down while simultaneously touching your forceps to the opposite end of your Mason Line. You want to keep
the Mason Line taut on either side of the string that now sits at the Mason Line's midpoint.
|

 |
|
You'll notice that the Mason Line will want to start twisting around itself at its halfway point where
your stray length of string is located. Allow the Mason Line to twist around itself a few times while
your forceps are still touching the other end of the Mason Line.
|
 |
|
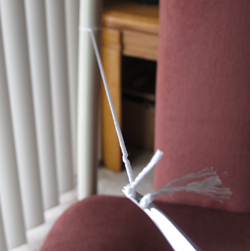
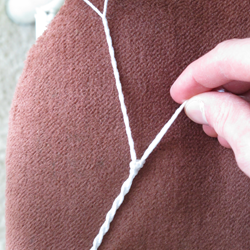
After the Mason Line twists around itself a few times, pull your forceps away from the other end of
the Mason Line. Now loosen your free hand's grip on the stray length of string; the Mason Line will
continue twisting around itself as a result. Use your free hand to guide the Mason Line as it twists
around itself, and slowly start moving your forceps back towards the other end of the Mason Line.
Your Mason Line will twist itself into a long "double-helix," as shown. Now it's beginning to look
like a proper popper!
|
 |
|
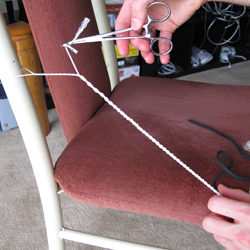
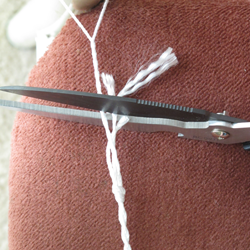
Measure the length of your twisted popper; you want the twisted length of your popper to be around
9-10 inches long. Firmly grip the popper at the 9-10 inch point with your free hand; DO NOT allow
the popper to unravel itself below the point that you're gripping it! If your popper unravels
itself at any point after this step, you will have to start all over again.
|
 |
|
While maintaining a secure grip on your popper, detach your forceps from the Mason Line, and
clamp your forceps right above the point where your free hand is holding the popper. This
will ensure that the popper will not unravel itself while you perform the next step.
|
 |
|
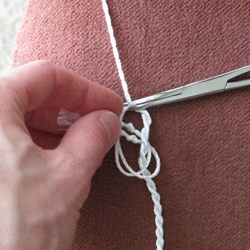
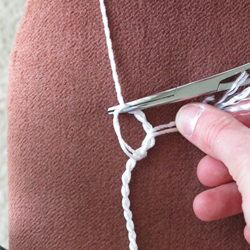
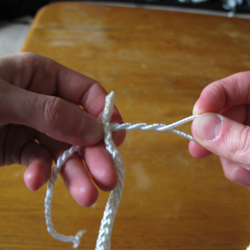
The last thing we need to do is to secure the popper by tying a double-overhand knot (a.k.a. a
"blood knot") at its tip. You do this by taking the two unsecured ends of your Mason Line that
are sticking out above your forceps, and bringing them downward towards the "double-helix" part
of the popper, and tying your double-overhand knot as shown.
|

 |
|
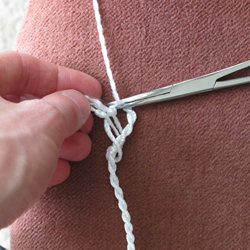
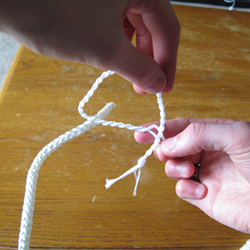
Pull your loose ends tightly around the forceps to form the knot. Next, remove the forceps and
finish tightening the knot as far as it will go. Take your scissors, and cut the four strands
above your knot to the desired length. Your popper is now complete!
|

 |
|
We've prepped our whip's tip and we've made a popper. Now let's put the two together. Take your
forceps (or needle nose tweezers) and gently push it through the tip of your whip just below the
point where you melted it.
|
 |
|
Open your forceps and clamp down on the looped end of your popper. Gently pull the popper through
your whip's tip. If there's a lot of resistance in trying to pull the popper through, try twisting
your forceps in the same direction as the popper's spiral. This makes the popper act like a screw,
which will help out a lot in getting it to pass through the whip without incident.
|

 |
|
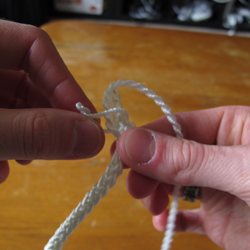
Grab the looped end of your popper and open the loop by twisting against the popper's spiral. Grab
the knotted end of the popper and pass it through this loop.
|
 |
|
Lastly, pass the loop over the tip of your whip, and then pull the knotted end of your popper firmly.
|
 |
|
Now your popper is attached, and your whip is completed! Huzzah!!!
|
 |